3D Animation - Lip Sync
UV Mapping and Texturing - The Bathysphere
Creating the map was simple enough by using Spherical Mapping. When I had finished creating the texture, I just moved the seem to the back of the model where it wouldn't be visible.
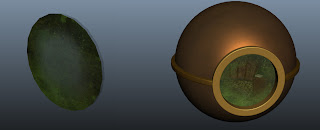
To create the texture for the exterior I mixed layers of paint strokes and textures with coloured overlays to obtain the exact look I wanted for the bathysphere. I also altered the material attributes to make the object look more metallic.To hide the seem, I decided to create a band with decorative rivets. I created a texture that was a close match to the shade of the porthole frame. I even experimented with bump mapping on this band, to make it appear slightly rusted.
To complete the bathysphere, I modelled a glass pane. I wanted to paint a grubby, worn-looking texture for the outside of the window to give the impression that the bathysphere has been underwater for quite a long time. As though algae has started to grow on its surface. On the inside section, I erased most of this texture, apart from a little "dust" at the edges where it hasn't been "cleaned".

Subscribe to:
Comments (Atom)


